Back up E-mails from Microsoft Outlook Express
Sabtu, 10 April 2010
posted by blog tono batam at 12.59 |
Permalink 
Back up E-mail from Microsoft Outlook
posted by blog tono batam at 12.40 |
Permalink
Set up E-mail account on Microsoft Outlook 2007
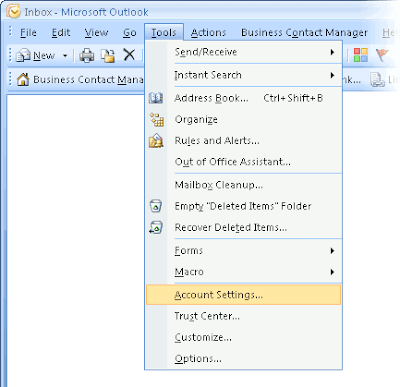
1. Open Microsoft Outlook 2007. Click on "Tools", and then click "Account Settings" from the toolbar.
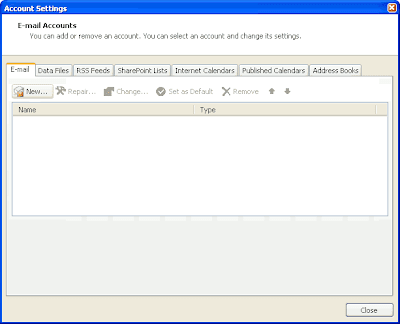 2. This will open the Account Settings pop-up window. Click on the "E-mail" tab, if it is not automatically selected, then click "New".
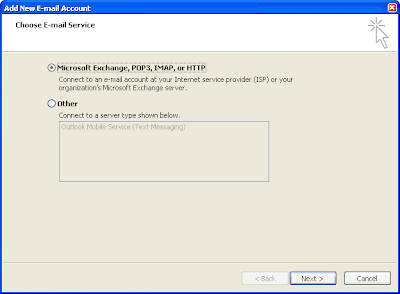
3. The Choose E-mail Service window will appear. Choose the "Microsoft Exchange, POP3, IMAP or HTTP" option, and then click "Next".
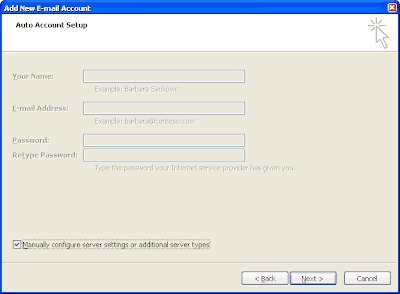
4. The "Auto Account Setup" screen appears. Leave these fields empty and select the "Manually configure server settings or additional server types" option and click "Next".
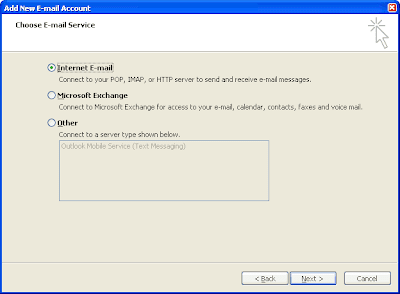
5. The "Choose E-mail Service" screen will appear again. Choose "Internet E-mail", then click "Next".
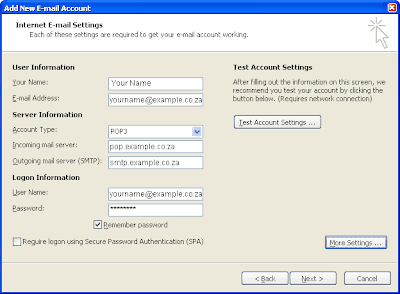
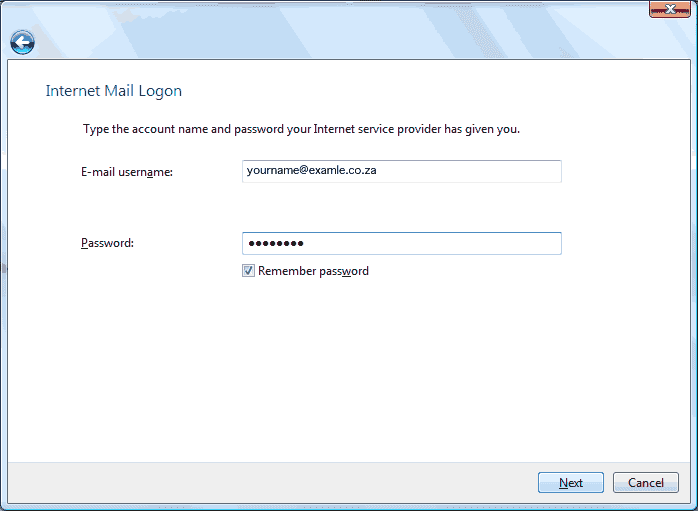
This will open the "Internet E-mail Settings" pop-up window.
Enter your name and surname in the Your Name field .
Enter your entire e-mail address in the E-mail address field.
For Account Type, choose "POP3".
The next option asks for the name of your Incoming mail server. Enter the following: pop.example.co.za ("example" is your domain name).
You then havee to enter the name of your Outgoing mail server. Enter the following: smtp.example.co.za ("example" is your domain name).
The next information that you will enter is the username and password for your email account. (We would havee sent your username and password to your existing e-mail address on the day you havee registered with ParkHost. If you do not havee this information anymore, you can call us and we will re-send it to you.)
There should be no tick in the checkbox for "Log on using Secure Password Authentication". Please remove it, if it is checked.
Then click on the "Next" button.
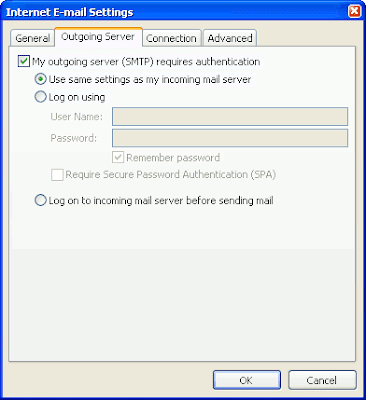
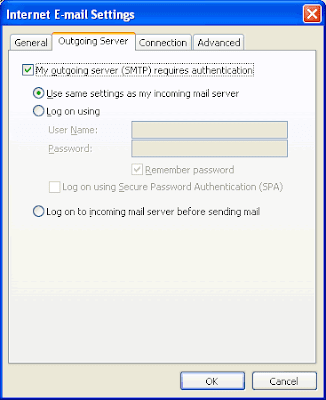
7. Click the "More Settings" button. The Internet E-mail Settings pop-up window will appear. Choose the "Outgoing Server" tab and check "My outgoing server (SMTP) requires authentication". Select "Use same settings as my incoming mail server"
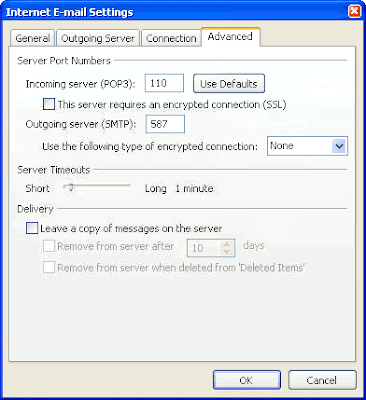
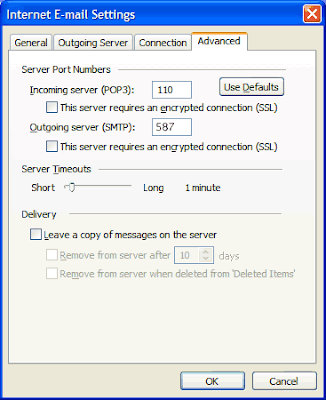
8. Next you must click the "Advanced" tab. Change the Outgoing Server (SMTP) port number to 587 and click "OK"
The add New E-mail Account screen will still be visible. Click on "Next" and then "OK". The setup is now complete.
Read More...
posted by blog tono batam at 12.13 |
Permalink
Set up E-mail account on Microsoft Outlook 2003
1. Launch Microsoft Outlook 2002 or 2003 Select "Tools" from the top menu bar and click "Email Accounts".
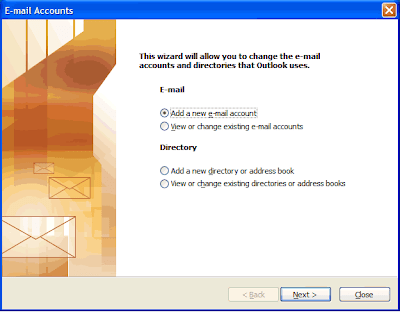 2. The Add a new email account pop-up window will appear. Select "Add a new e-mail account" and click "Next"
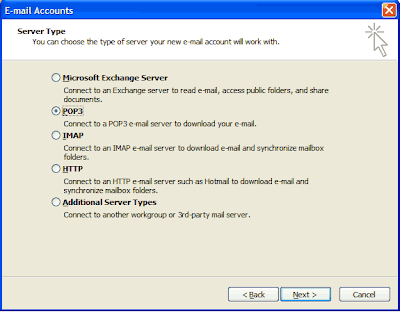
3. Select "POP3" as the server type, and click "Next"
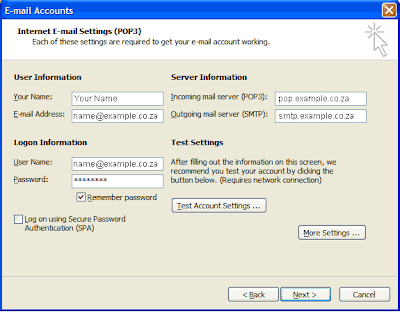
On the Internet E-mail Settings (POP3) window, enter your information as follows:
Enter your name and surname in the Your Name field.
Enter your entire e-mail address in the E-mail address field.
The next option asks for the name of your Incoming mail server (POP3). Enter the following: pop.example.co.za ("example" is your domain name).
You then havee to enter the name of your Outgoing mail server (SMTP). Enter the following: smtp.example.co.za ("example" is your domain name).
The next information that you will enter is the username and password for your email account. (We would havee sent your username and password to your existing e-mail address on the day you havee registered with ParkHost. If you do not havee this information anymore, you can call us and we will re-send it to you.)
There should be no tick in the checkbox for "Log on using Secure Password Authentication". Please remove it, if it is checked.
Then click on the "More Settings" button.

5. The Internet E-mail Settings pop-up window will appear. Click the "Outgoing Server" tab. Please ensure that the My outgoing server (SMTP) requires authentication checkbox is selected, as well as Use same setting as my incoming mail server.
 6. Select the "Advanced" tab from the top and change the Outgoing Server (SMTP) port to 587 and click on "OK"
6. The Internet E-mail Settings (POP3) window will still be open. Click "Next" and then on "Finish". The setup is now complete.
 Read More...
posted by blog tono batam at 00.50 |
Permalink
Back up E-mails from Microsoft Mail on Vista
posted by blog tono batam at 00.00 |
Permalink
Set up E-mail account Microsoft Windows Vista
Jumat, 09 April 2010
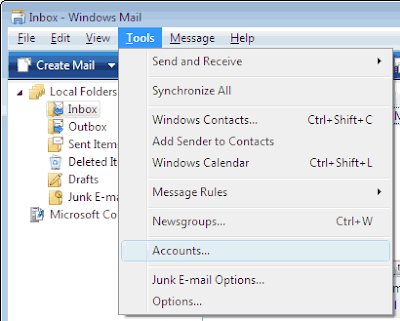
Open Windows Mail (Click "Start" then click "All Programs" and then click "Windows Mail").
Select "Tools" from the menu bar and then click on "Accounts".
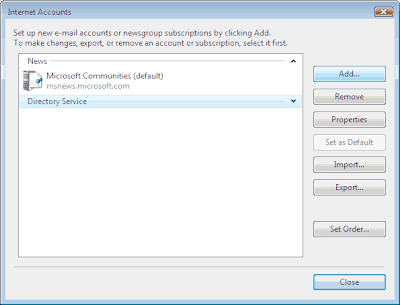
2. This will open the Internet Accounts pop-up window. Click on the "Add" button.
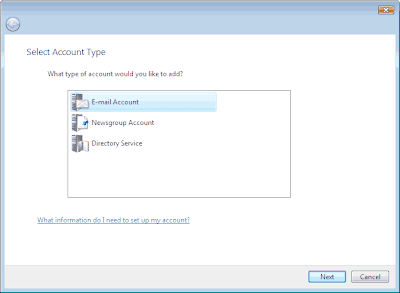 3. You will be prompted to Select Account Type. Select "E-mail Account" and click "Next".
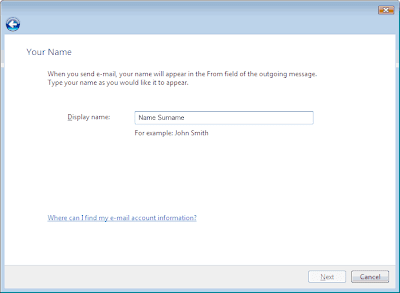 4. In the next window you will enter your name and surname and click "Next".
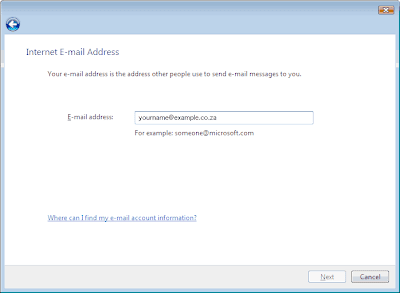
Next you will be prompted for your e-mail address. Enter your full e-mail address and click "Next".
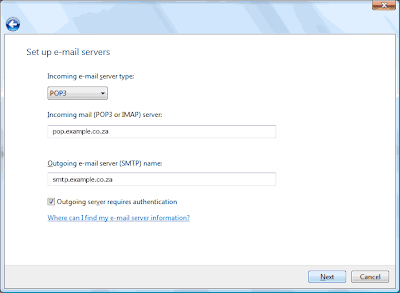
For Incoming e-mail server type, choose "POP3".
The next option asks for the name of your Incoming mail (POP3 or IMAP) server. Enter the following: pop.example.co.za ("example" is your domain name).
You then havee to enter the name of your Outgoing e-mail (SMTP) server. Enter the following: smtp.example.co.za ("example" is your domain name).
Add a tick in the checkbox for Outgoing server requires authentication and click "Next".
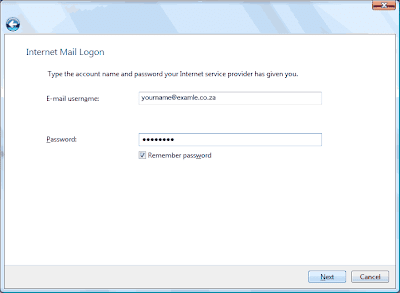
Enter your full e-mail address in the E-mail username field.
Enter your password in the Password field. (We would havee sent your username and password to your existing e-mail address on the day you havee registered with ParkHost. If you do not havee this information anymore, you can call us and we will re-send it to you.)
Click "Next"
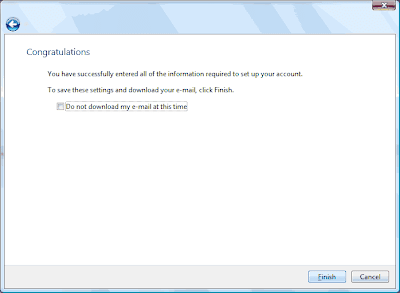
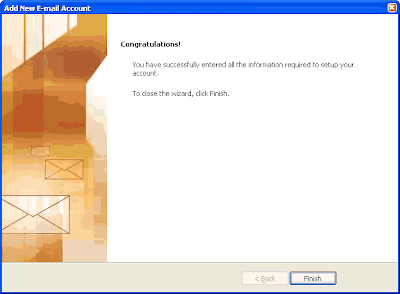
8. A Congratulations message will appear. Click "Finish".
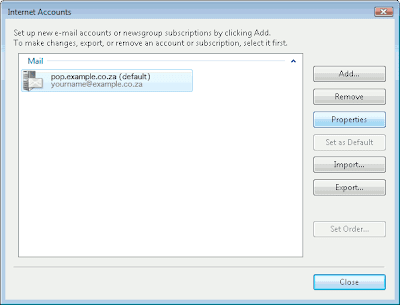 9. Now we havee to enable SMTP authentication. Your new e-mail account should be visible. Click on the "Properties" button.
 (If the Internet Accounts window has been closed, you can reach the properties window by clicking on "Tools" from the menu bar and then click on "Accounts".)
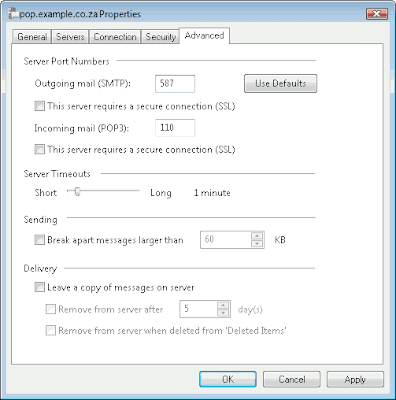
Click on the "Advanced" tab. Change the Outgoing mail (SMTP) port number to 587. Click "Apply" and then on "OK".
The setup is now complete.
Read More...
posted by blog tono batam at 10.55 |
Permalink
Memberi Tanda Lokasi Pada Wikimapia
Jumat, 02 Oktober 2009
 Batam - Anda semua pasti tau yang mananya GOOGLE MAP or GOOGLE EARTH yaitu suatu informasi geografis/ Peta geografis, Program ini memetakan bumi dari superimposisi gambar yang dikumpulkan dari pemetaan satelit, fotografi udara
.
Trus bagai mana cara untuk menandai suatu tempat/okasi
di Google Map ini...???Ternyata tidak begitu sulit, ini Langkahnya:
1. masuk ke www.wikimapia.org
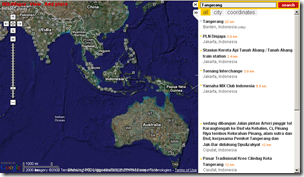
2. ketikan nama Daerah yang kita inginkan pada SEARCH kanan atas.
3. Setelah terlihat lokasi, lakukan Zoom In (dengan menggunakan tools yangada di bagian samping kiri) agar lokasi detail yang kita mau dibuat detailnya bisa terlihat lebih jelas.
4. Klik Add Place (tulisan warna merah) pada menu di bagian kiri atas. Maka akan muncul sebuah kotak kecil dengan garis putih putus-putus dan dibagiamn atas kotak itu ada menu SAVE dan CANCEL. Kotak putih inilah yang akan digunakan untuk menandai lokasi yang kita maksud. Kemudian klik SAVE setelah itu akan muncul kolom putih untuk memberi nama tempat tersebut.
 5. klik SAVE dan selesai.
Selamat Mencoba....!!!!!!
Read More...
posted by blog tono batam at 15.19 |
Permalink


 5. Select all of the content showing in the window and copy it to CD or DVD. The backup is now complete.


